View on phone
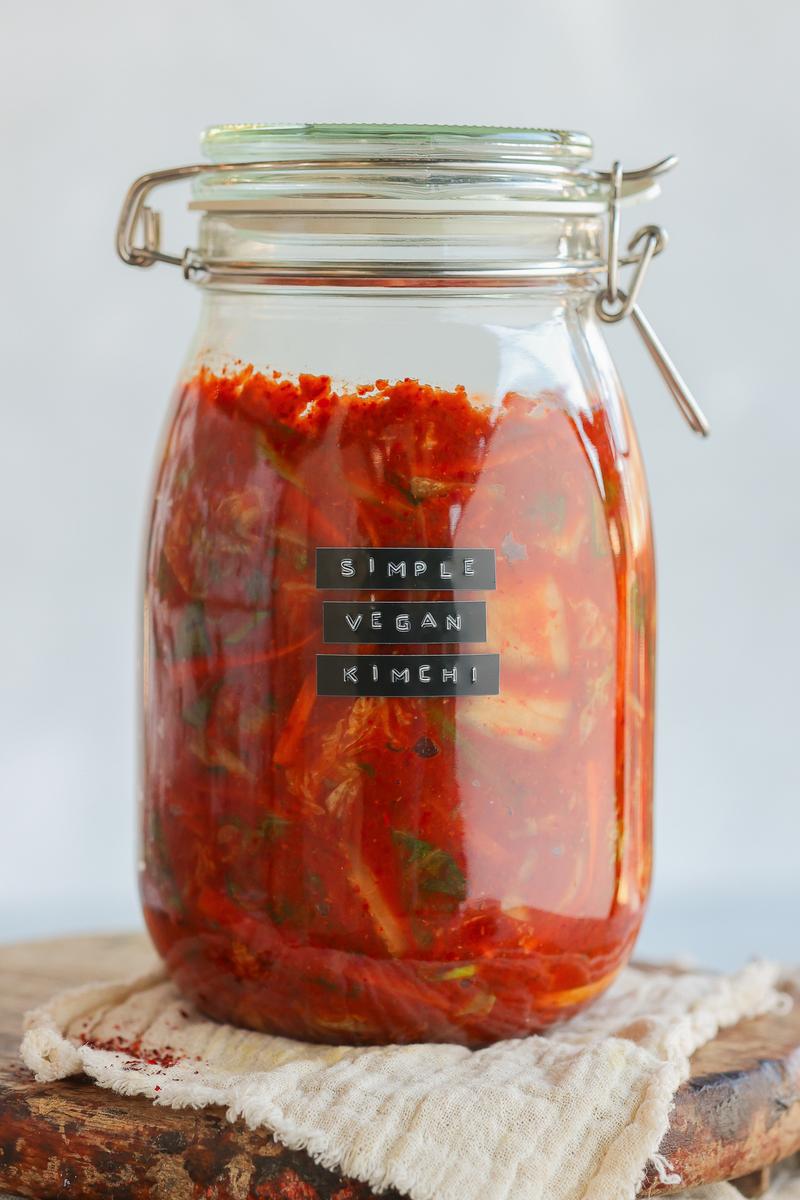
Simple Vegan Kimchi
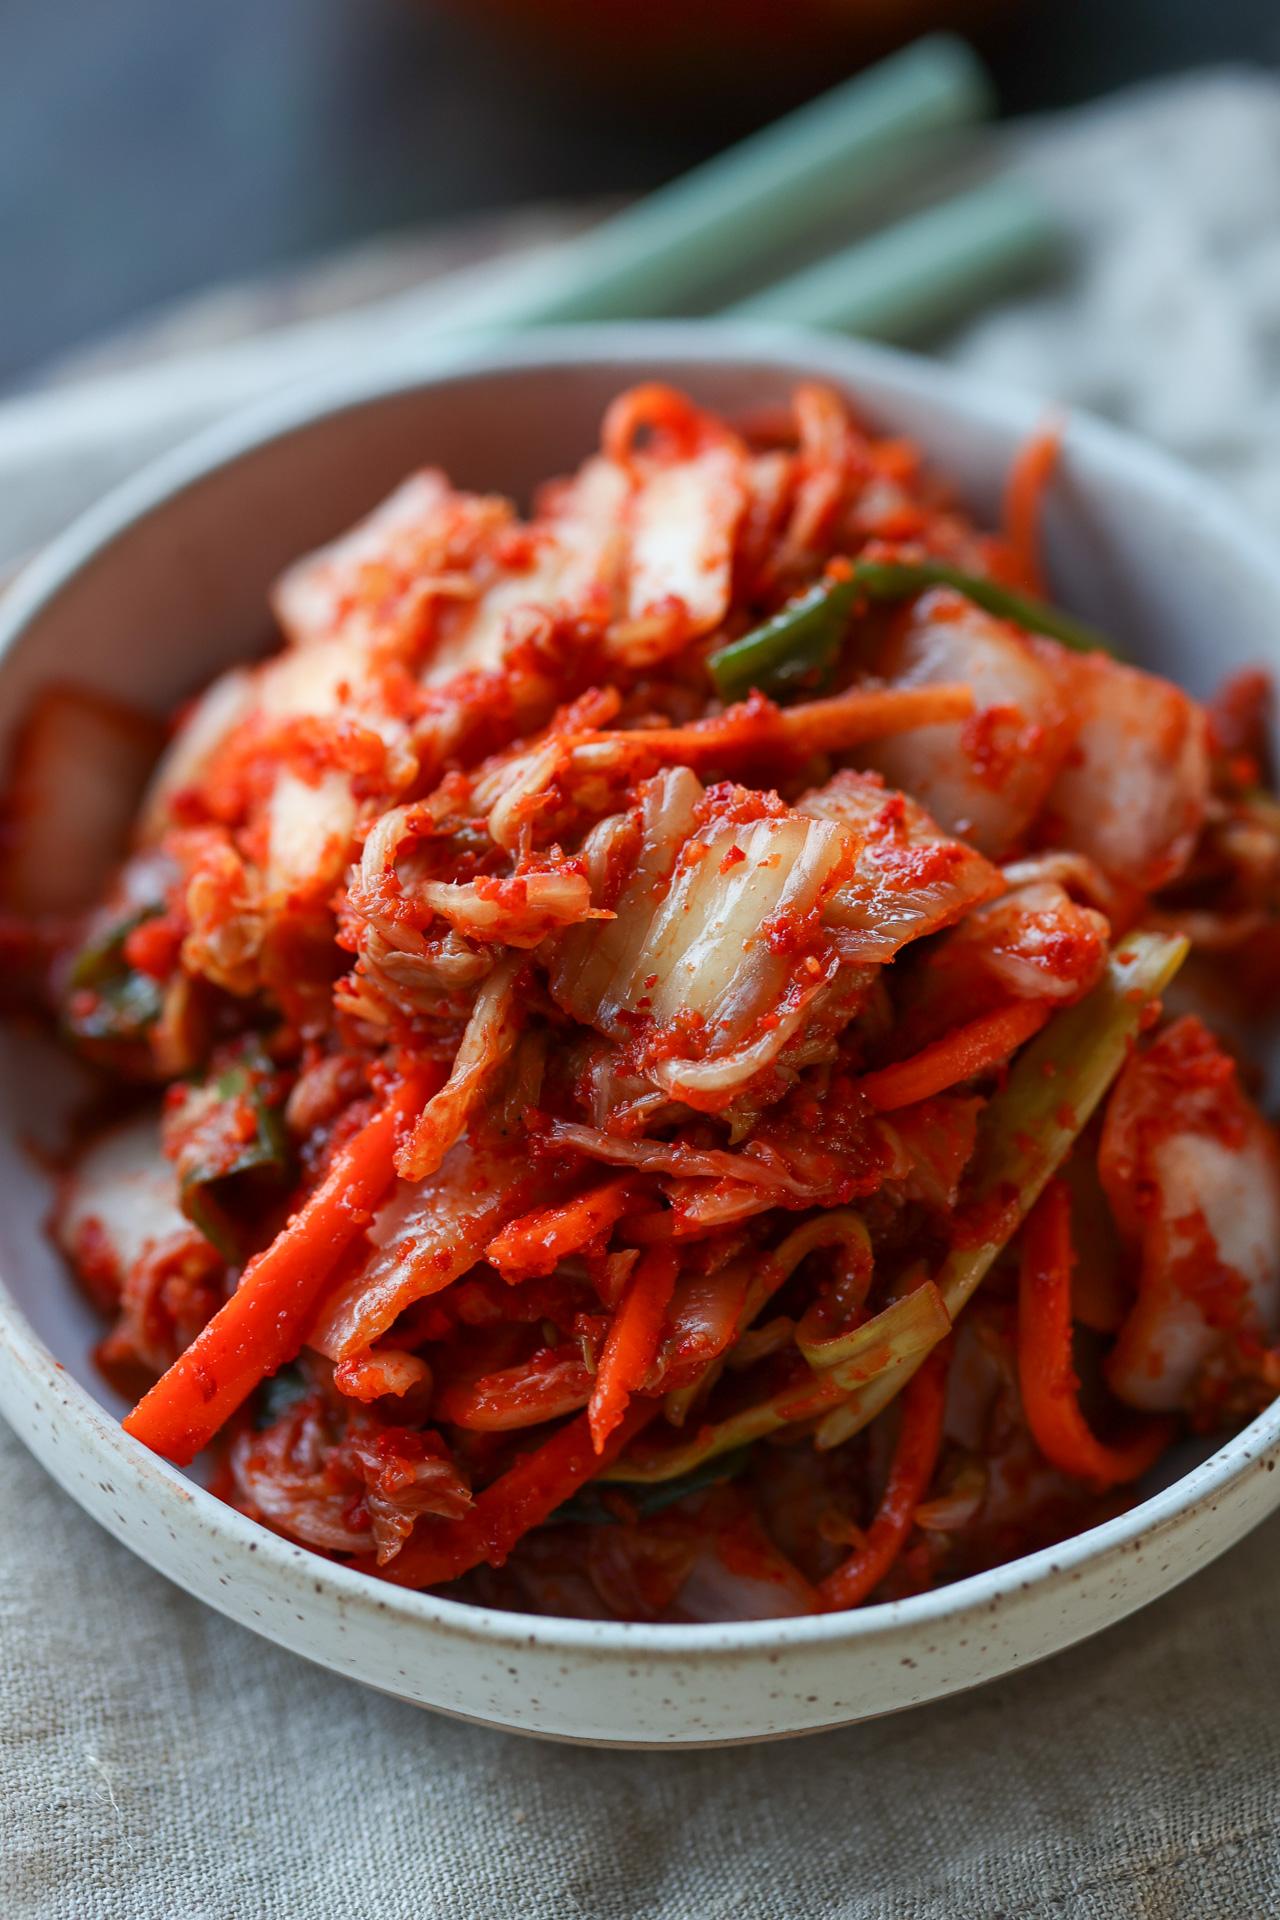
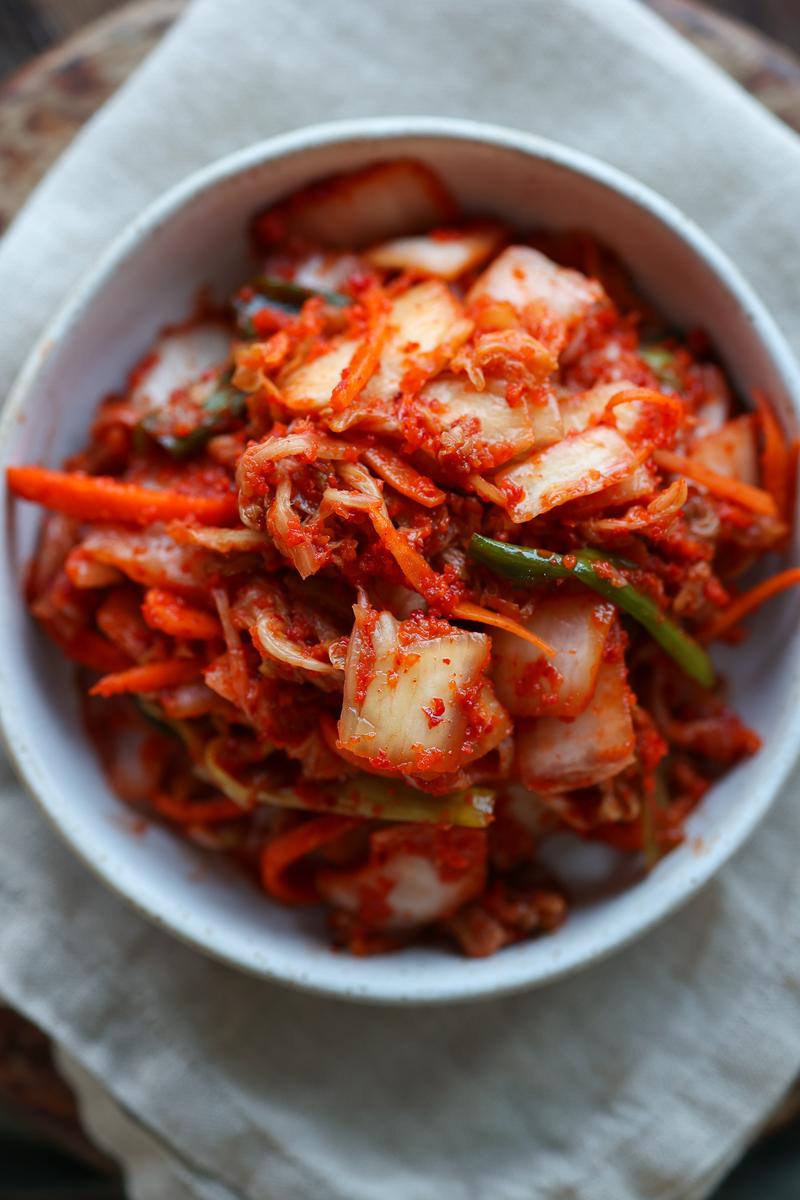
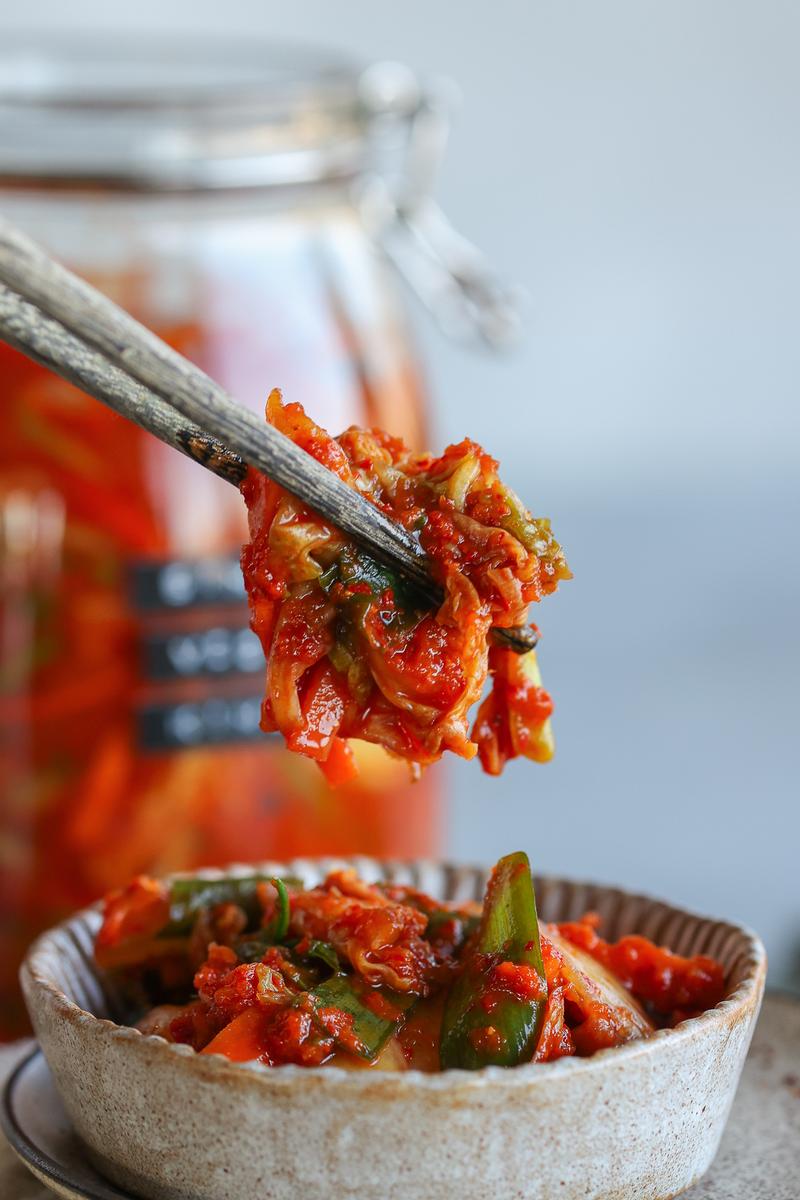
Kimchi is a spicy, tangy, probiotic-rich Korean fermented cabbage dish. Traditionally, kimchi is made with ingredients like fish sauce or shrimp paste, so this vegan kimchi recipe uses miso and soy sauce to deliver that same savoury, umami depth without any seafood. This easy homemade kimchi keeps the ingredient list simple with everyday staples that are easier to find, while still giving you the bold, authentic-tasting flavour kimchi is known for. It’s a budget-friendly kimchi option (especially compared to store-bought), completely customizable, and perfect as a side dish, mixed into kimchi fried rice, or spooned over nourish bowls, noodles, and toast for an instant punch of flavour.Servings
(¼ cup per serving)
Total
2 days, 2 hr + 30 minPrep
30 minRest
2 hrFerment
2 daysContains
soy
Swap out
gluten
Free from
peanut
tree nut
sesame


Ingredients
Cabbage
-
1napa cabbage, quartered lengthwise, cut into 2 cm pieces†
-
1½ Tbsp (27g)coarse sea salt (iodine-free)†
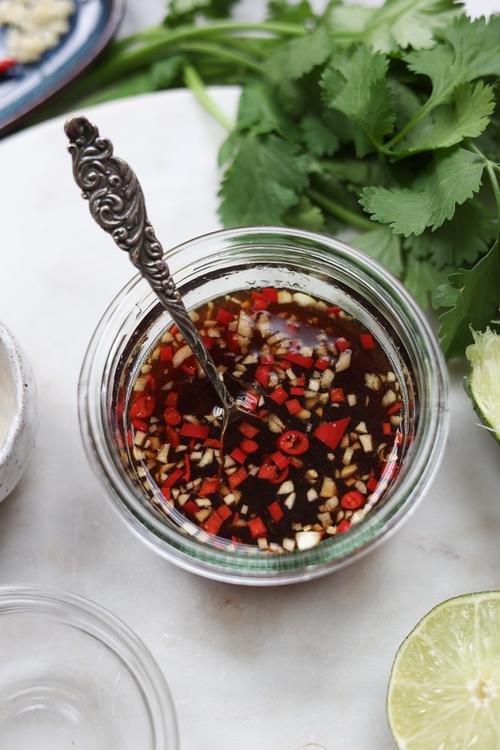
Kimchi paste
-
½small onion, chopped
-
5garlic cloves
-
½red apple, cored, chopped†
-
½ Tbsp (4g)fresh ginger
-
½ cup (120ml)vegetable broth
-
Vegetables
-
3stalks green onion, cut in 5 cm pieces, sliced lengthwise
-
1medium carrot, cut into matchsticks†
Directions
- Add the cabbage and salt to a large bowl. Gently massage the cabbage for 2 to 3 minutes, until it starts to soften. Let rest for 2 hours, stirring occasionally, until the cabbage is wilted and sitting in a briny liquid.
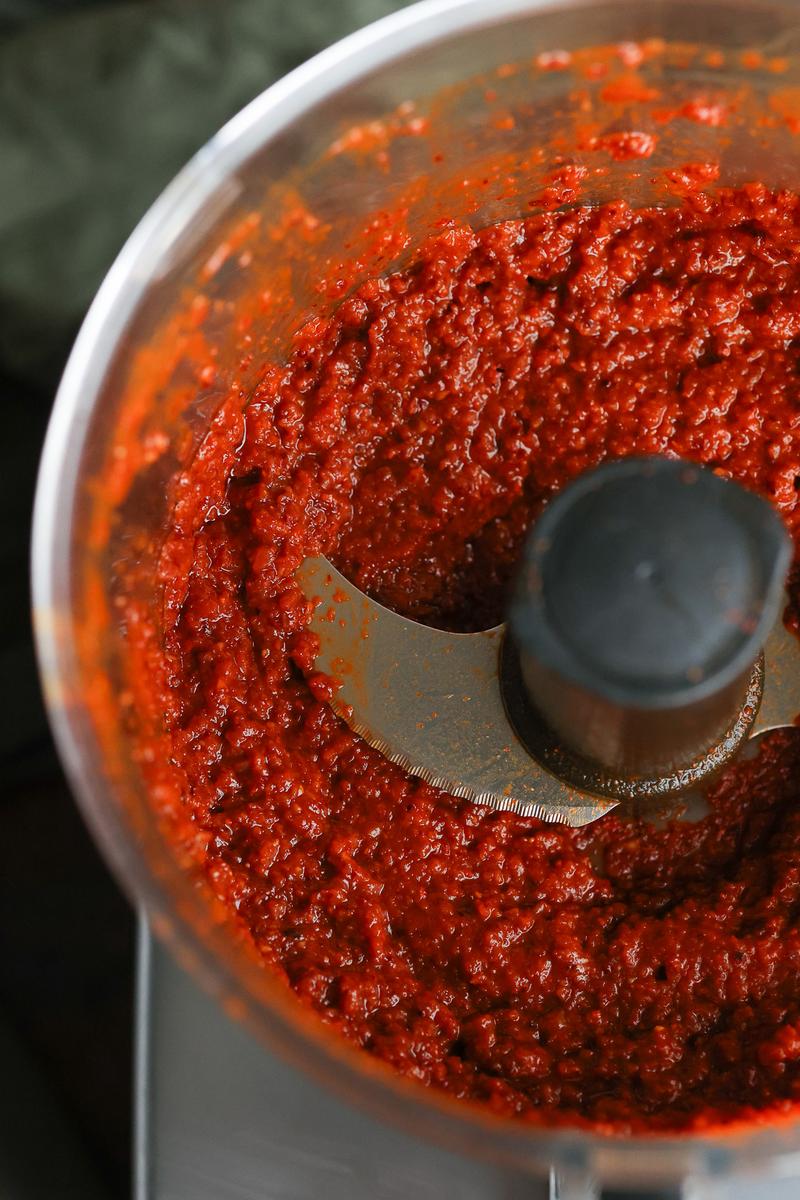
- In a food processor, combine all the kimchi paste ingredients.
- Blend until smooth.
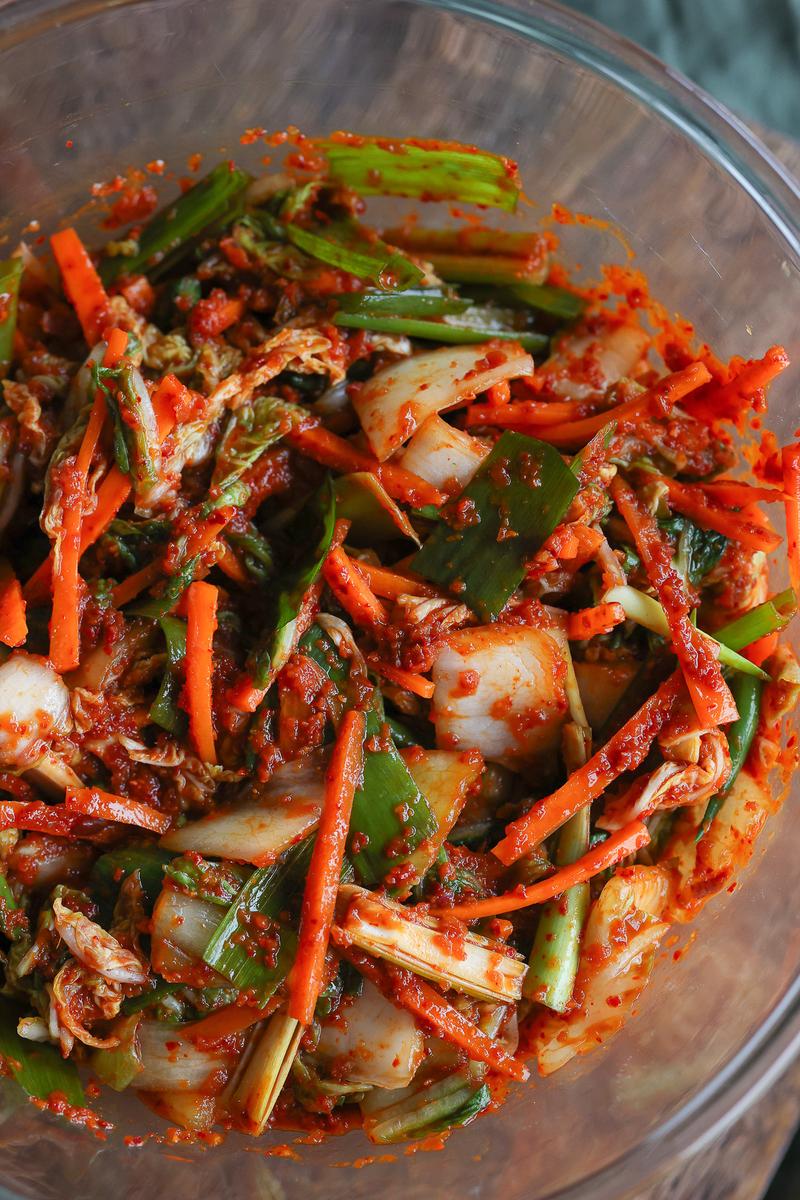
- Transfer the paste to a large bowl along with the green onion and carrot.
- After the cabbage has rested, rinse it under cold water to wash off the salt. Drain well, then give it a gentle squeeze with your hands to remove dripping water, without wringing it completely dry.
- Transfer the drained cabbage back to the large bowl. Mix everything together with your hands to thoroughly coat every piece.
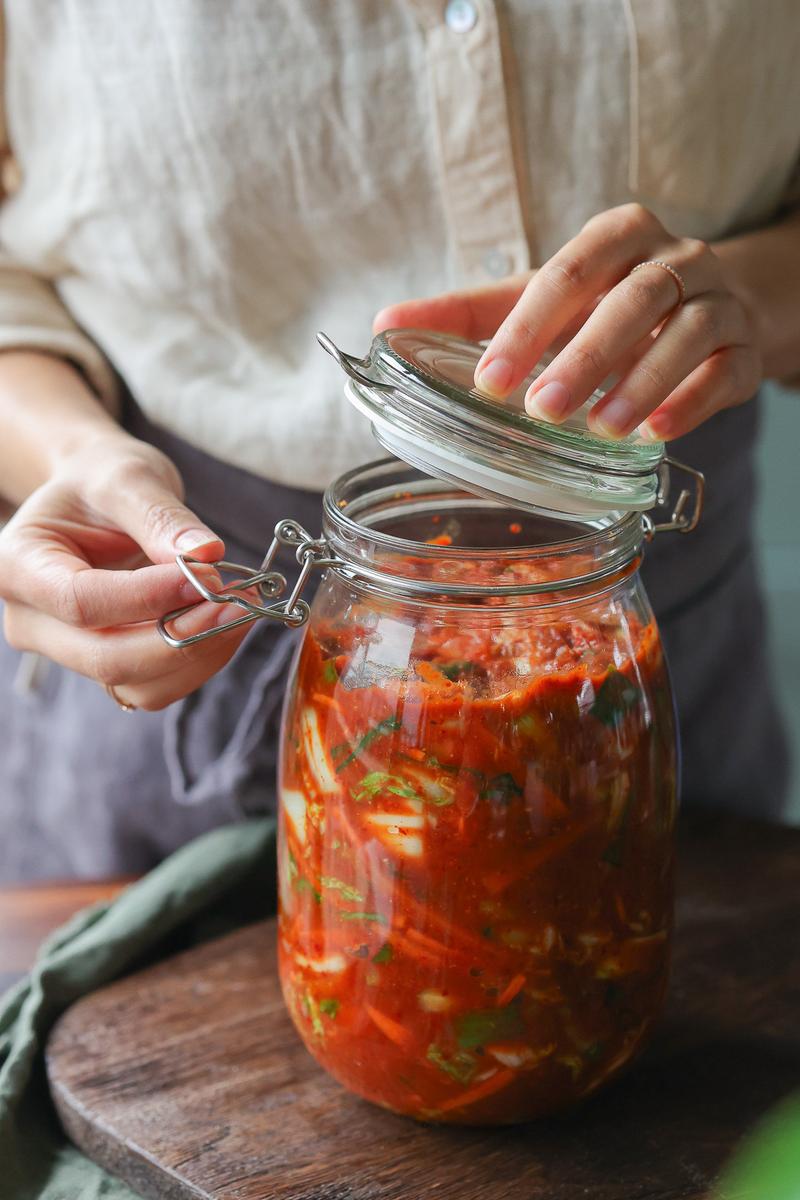
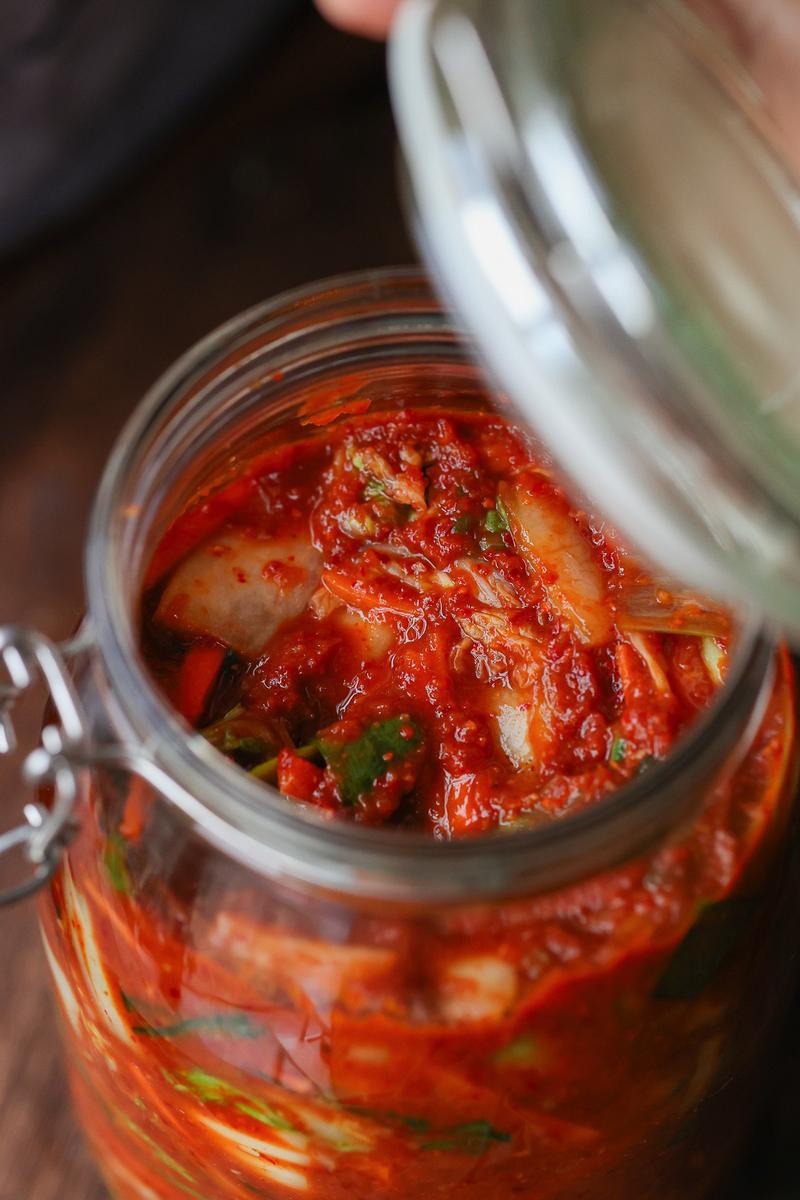
- Transfer to a mason jar and press it down firmly with a spoon. Leave an inch (2 cm) of "breathing room" at the top of each jar for the gas produced during fermentation.
- Close tightly with a lid. Leave the kimchi on the counter overnight, away from direct sunlight or heat sources.
- Open the lid the next day for gas to escape and taste for mild sourness. For a tangier taste, let it sit on the counter for 1 - 3 more days, burping twice a day**.
- The kimchi is ready to enjoy after the first 1 - 2 days. For more complex and delicious flavours, close the lid of the jar, and place the kimchi in the fridge for 1 - 2 weeks to continue to ferment and set. Enjoy!
Notes
- †For us, 1 napa cabbage weighed 1 kg.
- †Use non iodized salt for the most reliable fermentation.
- †We recommend a sweet apple variety, like fuji, honeycrisp or gala.
- †Gochugaru is made from Korean dried red chili peppers. It can be found at most Asian supermarkets.
- †White miso, also called "Shiro Miso," is fermented for less time than red miso, which gives it a milder, sweeter flavour. If substituting red miso, use a smaller amount and adjust to taste, as red miso is saltier and stronger.
- †For us, 1 carrot weighed 150 g.
- ** We often ferment for 1 day during warm summer months and 2 - 4 days during colder winter months.
Storage
- The kimchi can be stored in a mason jar or airtight container in the fridge for up to 3 months.
- Always use clean utensils when removing some of the kimchi from the jar to keep it from spoiling.
Let us know what you think
Watch it step-by-step!
Nutrition info
Focusing on numbers can harm our relationship with food. Instead, our philosophy is to Nourish the Cells & the Soul. For specific nutrition needs due to a medical condition, consult a dietitian or physician. While we strive to provide accurate nutritional information, we cannot guarantee its accuracy. See our disclaimer for details.
Frequently asked questions
How long does homemade vegan kimchi take to ferment?
At room temperature, it usually takes 1 to 3 days to start tasting tangy and “kimchi like.” If your kitchen is cool, it can take closer to 3 to 5 days. After that, it keeps fermenting slowly in the fridge, where the flavour continues to deepen over 1 to 2 weeks.
What if my kimchi isn’t fermenting?
Temperature has a huge impact on fermentation speed. In a warm kitchen, kimchi can start turning tangy within 1 to 2 days, but in a cooler space it may take several days before you notice much change. If it seems stalled, move the jar to a slightly warmer spot out of direct sun and give it more time, as the lactic acid bacteria work faster at warmer room temperatures and much more slowly in the cold.
How do I know when kimchi is ready to eat?
It’s ready when it smells and tastes pleasantly tangy, and you may see small bubbles or a little fizz when you press the cabbage down. If you like fresher, crunchier kimchi, start tasting at 24 hours. If you prefer more sour kimchi, let it go longer.
Can I make kimchi without gochugaru?
Some people say you can, but I wouldn’t recommend it. Any substitute won’t really taste like classic kimchi, so for me, gochugaru is the one non-negotiable ingredient. It gives kimchi its signature fruity heat and vibrant red colour. You can find gochugaru at most Asian supermarkets, or online.
What type of salt should I use for kimchi, and should I measure by grams or cups?
Use a non iodized salt like coarse sea salt, kosher salt, or pickling salt for the most consistent results. Measure by grams whenever possible, since different salts vary hugely by volume, so a “tablespoon” can over or under salt your kimchi depending on the crystal size. Aim for about 25 g salt per 1 kg cabbage. That’s roughly 2½ Tbsp coarse kosher salt (light, flaky crystals), 1½ Tbsp coarse sea salt (denser crystals), or 1¼ Tbsp fine table salt (very fine and dense), depending on the brand.
Why does the salt need to be iodine-free?
It doesn’t strictly need to be, but it is recommended. We suggest non iodized salt because it tends to give the most consistent results. Iodized table salt often contains additives that can make the brine look cloudy, and iodine can sometimes affect the colour over time. Using sea salt, kosher salt, or pickling salt is the simplest way to keep the flavour clean and the texture reliably crisp.
Can I add other vegetables like daikon or cucumber?
Crunchy veggies like daikon (or other radishes) are classic add-ins and ferment beautifully. Cucumber can work too, but it releases more water and softens much faster, so it’s best in smaller amounts and for kimchi you plan to enjoy sooner rather than later.
Can I substitute miso, or leave it out?
You can leave it out, but the flavour will be a little less rich and savoury. If you’d like to make up some of that umami, add a splash more soy sauce to taste.
Is this vegan kimchi gluten-free?
It can be. Use gluten-free miso and a gluten-free soy sauce (tamari is a common option, but still check the label). If you use regular soy sauce or miso that contains barley or wheat, then it won’t be gluten-free.
Why is my kimchi so thick? Doesn't it need to be submerged in brine?
It’s okay if your kimchi starts out thick and paste-like. Unlike many pickles, kimchi often ferments as cabbage coated in seasoning paste, and it usually releases liquid over the first day or two as the salt draws out moisture. Pack the kimchi firmly into the jar and press it down so there are as few air pockets as possible, then let it sit and it should become slightly juicier with time.


Leave a comment
Thank you
I paired it with Lubia Polow today and it was amazing!
It is a bit too spicy and garlicky for my taste, so, I guess I reduce the gochugaru and garlic next time. Otherwise I can absolutely recommend the recipe.
I love your recipes but this time you've hit it out of tge ballpark!
WOW!!!! this kimchi is amazing!!! i have never fermented anything before, so of course i was worried i would mess something up, but your instructions and video are both so informative and so helpful that it was easy to follow exactly what to do. thank you for the reply about my homemade veggie broth…it added a nice flavor base 💚 i will be making this kimchi from now on!!
I made perfect kimchi like yours kimchi.
hi!! i never made kimchi before, but i
eat it every morning so i wanted to try
making it myself. the ingredient list is
so easy and i was able to get all of
them at the farmers market (including daikon, which i plan on adding too). i make my own vegetable broth in the crockpot using veggie scraps from my kitchen. i add in celtic salt,
peppercorns and some bay leaves when cooking it. do you think using my own broth will impact the fermentation process or is it ok to use?
It tastes much fresher than from the supermarket, in a good way. I guess I did wringle the salted cabbage too much in the beginning and there was not enough salt left which made the fermentation very slow and I did not see any typical signs like bubbles and so on either. So I though why not put some salt back and I poured a little soy sauce on top (it was after ~2 days) and yeah, from then on it was very active and the taste improved as well (while it was sitting before soy sauce addition it tasted like spiced cabbage). So I left it to ferment properly for another two days and now it is really really good. Also another observation: I stabbed the kimchi in the beginning with a chopstick again and again to remove the air pockets- I thought it can get mold there otherwise so everything needs to be covered. But actually I might have introduced too much oxygen in the kimchi this way and it Interfered with the fermentation as kimchi fermentation apparently needs anaerobic conditions.
Hi. Made this simple vegan kimchi recently and boy it's so good. It's an instant flavour booster to anything and my favourite way to have it is stirfry my tofu/tempeh, add kimchi and have it as is... It's a banger recipe Sadia
This recipe is so approachable for something that usually feels a bit intimidating like kimchi fermentation. I really appreciate how simple the ingredient list is while still keeping that authentic umami depth from the miso and soy sauce.
I also like how flexible the fermentation timing is explained — it makes it much less stressful for beginners when the process doesn’t have to be exact to the hour. I’ve had similar experiences with ferments where nothing seems to happen in the first day or two, but then suddenly everything develops perfectly once it gets going.
The balance of spice from gochugaru, sweetness from apple, and the savory base really makes this feel like a recipe that can work both as a side and as a meal enhancer. I’m especially excited to try it with rice bowls and noodles once it’s fully fermented.
Definitely one of those recipes that makes homemade fermentation feel a lot more doable and fun.
Thank you for this recipe. Looks like fun easy very rewarding project. Nice improvement from mine currently used.
Hello, thank you for the recipe! For some reasons my kimchi does not do much after 24 hours even though it sits at a pretty warm spot. Do you know what could cause this? I've read that more salt could help and do you know if I could just add more also later in the process? Thank you for all your great recipes! :)
Hey there! Can I swap napa with white cabbage?
It turned out perfect! I was even able to find everything (except the gochugaru) at my local grocery store. I’ve been snacking on it everyday and I’ve even gotten my boyfriend to add it to his broodje kaas 🤩
Super fun to make and so tasty! We are eating kimchi with everything now. 😂 Thanks for the great and accessible recipe!
Sadia, this kimchi recipe is so quick, easy and delish that it is unlikely that I will ever go back to the version I used to make. Another winner from PUL! =^••^=
So easy to make and very tasty. I have been feeling intimidated by the other recipe you have so I've never tried it. And this one is just perfect!
I never really liked kimchi but I wanted to try this version and it's absolutely delicious! I'm already planning to make a new batch.
Oh this was amazing! I thought kimchi would be harder to make for some reason, but this was so easy! And I have a whole jar in the fridge now!? I think this is going to become a regular! Thanks so much PUL!!
Can you use Gochugaru paste rather than dried ? I can't find the dried here only the paste? Thanks
Hi. Love the recipe but need a clarification: the video says to let the salted cabbage rest for 2 hours but the recipe here says 2-3 minutes. Which one is correct? thanks!
I love kimchi but I can't eat spicy foods, really :( could you share/create a mild version, by any chance? Thanks so much in advance ❤️❤️❤️
Hi,
What other liquid could substitute for the vegetable broth?. Thanks for posting the recipe .
Vielen Dank das sie meinen Vorschlag so positiv aufgenommen haben!
Liebe Grüße Gabriel
Hallo.
Ich hoffe es ist in Ordnung das ich hier Antworte.
Vielleicht wollen sie es ja mit Google übersetzen.
@Katya wenn sie kein Jod freies Salz zu kaufen bekommen, dann kaufen sie ganze Salz Kristalle - Salz - Rohbrocken dann könne sie eine Salzlösung herstellen.
Oder können sie eventuell bei KoRo bestellen? Wenn ja, dann schauen sie mal nach diesem Salz.
Salz ohne Zusätze.
Ich liebe veganes selbstgemachtes Kimchi! 💕
Viele Grüße Gabriel
Hey! Thanks for this recipe, so excited to try it!
With the default quantities of this recipe, what kind of capacity should the glass container have? Is 1L sufficient, or should it be larger?
Thanks in advance ☺️
What if I don’t have non-iodised salt in my country? Like, it’s by law that the salt is all iodised..